Monday, September 19, 2011

Lazy Monday: Mac & Cheese and Sloppy Joe Sandwiches

Mondays are a hard day for me to get motivated to actually cook dinner. I'm sure you know what I mean, you go back to work, all you want is for it to be the weekend when you get done, but it's not. You are all the way at the bad end of the week, and then you have to make dinner.

We have had Pizza Monday for the last few weeks. There is a Fox's Pizza down the street from us and we have been picking up a pizza and then catching up on True Blood. Last Monday, I decided to make dinner, but kind of cheat and not make it really from scratch.

This is not my idea, one of my best friends came up with the idea of mixing macaroni and cheese and sloppy joe together to make delicious sandwiches and we have it sometimes and it's freakin' delicious.

Here are the ingredients (minus the hamburger, I had already put it in the pan):


I am not going to describe too much as to how to make these things. I'm sure you can read the back of the package. But you take your sloppy joe mix:


and you take your macaroni (I think this was before I baked it)


And then you put a spoonful or two of sloppy joe on a hamburger bun, and top it with some mac and cheese. It looks like this:


Yes, it tastes as good as it looks. Make these soon!

Mac & Cheese and Sloppy Joe Sandwiches

1 package macaroni and cheese (whatever brand you like, or homemade!)
1 lb. ground hamburger or turkey
1 packet of sloppy joe seasoning
1 can tomato paste

1. Make macaroni and cheese according to package directions. I used the Homestyle Kraft brand, it was pretty tasty.
2. Make sloppy joes according to package directions. I used tomato paste and a seasoning packet, but you could certainly used canned sauce if you prefer that.
3. Put both on hamburger bun!
4. Eat!

Thanks for reading!

<3, Carly


Best Blogger Tips

Blogger Tips - Get This Gadget

Saturday, September 17, 2011

Brownie Cookies

This week I took a little poll from the guys in my DnD group to find out what they wanted me to make for the game, and someone suggested brownies. I saw this recipe on Foodgawker and knew I had hit the jackpot.

WARNING: These are super crazy incredibly rich.

I actually didn't even put in as much chocolate as the original recipe calls for, and I feel like just one of these could maybe get my chocolate cravings in check for the rest of the week. I, however, am oddly not much of a chocolate person in general. But if you are a chocoholic, you are going to love these.

Your ingredients:

First, take your baking chocolate and chop it up into little pieces. I just broke mine up at the little perforations on the bar, but don't be like me. Follow the rules, otherwise, it will take forever for your chocolate to melt.

 
Put 1 stick (1/2 cup) butter, 1 1/2 cups of semi-sweet chocolate chips, and 4 oz. of unsweetened baking chocolate (that has been chopped into smaller pieces than you see above!) in a saucepan and cook over low heat until melted smooth.


Eventually, all your chocolate and butter will melt and look like a smooth lake of chocolate. Except in a saucepan.


Take off the heat and let chocolate cool while you get the other ingredients ready.

In a medium sized bowl, mix 1 1/2 cups flour, 1/2 teaspoon baking powder, and 1/2 teaspoon of salt. Set aside.

In a separate large bowl, beat 1 1/2 cups sugar, 4 eggs, and 2 teaspoons vanilla.


Slowly add in your dry ingredients and beat until well mixed.


Then you get to add all the chocolatey goodness.


The original recipe calls for 3 cups of semi-sweet chocolate chips, half of which you melt to make your chocolate sauce and the rest you are supposed to stir in at this point. I didn't actually have another 1 1/2 cups of semi-sweet chocolate chips, so I just put in about the 1/2 cup that I had left.

If I made these again, I might put in something else in place of the extra chocolate chips, maybe some walnuts or something like that to help tone down the richness of the chocolate that is already in the batter.

Preheat your oven to 350 degrees and put about teaspoon sized blobs of your batter on un-greased cookie sheets.


Bake for 10 minutes. While you're waiting, go snuggle your kitty if you have one. Mine was taking a nap.


Sorry. I get distracted by kitties.

Let the cookies cool slightly before transferring to wire racks to finish cooling.


Ready to eat!


Brownie Cookies
adapted from Dainty Chef

1/2 cup butter
4 oz. unsweetened baking chocolate, chopped
2 cups semi-sweet chocolate chips, divided
1 1/2 cups flour
1/2 teaspoon baking powder
1/2 teaspoon salt
1 1/2 cups sugar
4 eggs
2 teaspoons vanilla extract

1. Chop your baking chocolate and add it, 1 1/2 cups semi-sweet chips, and the butter to a saucepan. Cook over low heat stirring constantly until completely melted. Take off heat and let cool.
2. In a medium bowl, mix flour, baking powder, and salt. Set aside.
3. In a large bowl, beat sugar, eggs, and vanilla and then slowly incorporate the dry ingredients, then beat in the chocolate sauce.
4. Stir in the remaining semi-sweet chocolate chips (or any other replace you may want to use like walnuts)
5. Preheat oven to 350 degrees. Put approximately teaspoon sized drops of batter on un-greased cookie sheet. Bake for 10 minutes.
6. Let cool slightly after removing from oven, then transfer to wire racks to finish cooling. Enjoy!

Thanks for reading!

<3, Carly


Best Blogger Tips

Blogger Tips - Get This Gadget

Monday, September 12, 2011

Caramelized Onion Dip

 Hi, all!

Sorry for a delay in posts, it's been crazy around here and I just got back from a mini vacation at the beach. I have been pretty bad at remembering to take pictures of the dinners I have made recently, so today I am going to share a dip I made for my DnD group a few weeks ago.

I would like to say I made a really good dinner for them using this recipe for Linguine alla Carbonara but I didn't take very many pictures. Jason bought me some delicious hard ciders and that was the night that me, as a rare drinker, had 3 hard ciders pretty quickly and picture taking went by the wayside. By the way, make that. It was freakin' delicious and that is one of my new favoritest blogs.

Back to the dip!

First you are going to slice up some onions pretty thinly. 3 onions in fact. My eyes watered. It looked like something terrible had happened but I was just slicing onions.


Next, you will need to melt 2 tablespoons of butter in a large skillet. I did mine over medium-high heat because I am impatient, but it might be best if you do it at medium heat.


The rest of this is really a waiting game. You are going smell delicious cooking onions throughout your house and have to wait for them to be done.


This was right after I put them in.


*Sigh* still not done.

I went ahead and mixed up the other part of the dip while I was waiting on my onions to caramelize because it took about 30-40 minutes for that to happen.

You will need to add in 1 8 ounce package of cream cheese, and 1 cup of mayonnaise and stir them together.


That's just cream cheese.


There's the cream cheese and 1 cup of mayo. Oh, yum.


Look! Look! The onions are almost done!

Once they were done I put them in the bowl with the cream cheese/mayo mixture and then I added in 1 8 oz. package of shredded Swiss cheese. And then the 8 oz. package of Parmesan cheese.


Then you are going to mix all that delici-ocity (What? It's totally a word. A word I made up.) together and put it in a baking dish. I used a glass bread pan thing, but you could probably use just about any casserole dish, just nothing too shallow because you don't want it to burn.


Bake it in the oven at 375 degress for about 30 minutes or until it gets that pretty golden color and nice and bubbly from all the cheesy goodness.

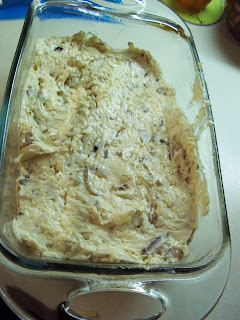
Like this:


The magazine that I got the recipe from said that you should serve this with sweet potato chips. It's what I did. I followed the magazine's rules. You might not want to, or at the very least, get some thick sweet potato chips. Maybe pita chips would be good? Oooo or garlic bagel chips! They would also be tasty. But dip whatever you want in this, it's amazing.


So good! Hope you make and enjoy it!

Caramelized Onion Dip
recipe from Gooseberry Patch Halloween 2010

2 tbsp butter
3 onions, sliced thinly
8 oz. package cream cheese
8 oz. package shredded Swiss cheese
1 c. grated Parmesan cheese
1 c. mayonnaise
Dipping implements of your choice (sweet potato chips, pita chips, bagel chips, etc.)

1. Melt butter in a large skillet over medium heat and add in onions. Cook for approximately 30-40 minutes or until onions are caramel colored. Make sure you stir them frequently so they don't burn!
2. Combine cream cheese and mayo, then add in the Swiss cheese, Parmesan cheese, and onions.
3. Put in a casserole dish and bake at 375 degrees for about 30 minutes or until golden and bubbly good. 

Thanks for reading!

<3, Carly
Best Blogger Tips

Blogger Tips - Get This Gadget

Tuesday, September 6, 2011

Apple Whoopie Pies

Before I tell you about how I made these tasty apple whoopie pies this weekend for my DnD group, I am going to tell you a delightful little anecdote about whoopie pies.

My mom is from Maine, and she and I visited family there last December. There was a really awesome deli that we visited the day before we left that had whoopie pies that were seriously the size of dinner plates. I got a chocolate peanut butter one for the boyfrand, and a pumpkin one for me because I am and always will be obsessed with anything pumpkin.

Anyways, I decided to put them in my carry-on bag to try to deter some of the inevitable squishing that would occur. I was going through airport security and they kept bringing more and more people to look at the x-ray of my bag. Finally, they announce loudly that they needed to see the person who the bag belonged to so I ran over and they said they needed to go through my bag. All I had in there was a book, an MP3 player, some ear buds, and maybe a hoodie or something so I was super confused. The security guy yelled at me not to touch the bag, and then pulled out a plastic bag from my little canvas carry-on.

"WHAT IS THIS?" he said loudly.

"Um...whoopie pies." I answered back.

He then burst out laughing and had to go show all his security friends that the security threat was two whoopie pies in a bag. Needless to say, my family from Maine thought it was pretty funny. I was embarrassed and my whoopie pies got more smushed so I was really sad about it.

But now that I have told you my embarrassing story, onto the baking.

Here are your ingredients:


First things first, go ahead and preheat your oven to 350 degrees. Then you will need to take 1 (or more) baking trays and cover them with parchment paper. I ended up swapping out about 3-4 different baking sheets to make the process go a little faster.

In a large bowl, beat your 2 cups of packed brown sugar and 3/4 cup unsalted, soft, butter. Once it's all nice and fluffy, beat in your 2 eggs and 1 teaspoon of vanilla.


Add in 1 1/2 cups applesauce. If you are fancy enough to have your own homemade applesauce you can certainly use that, but I have never made my own applesauce, so I bought some unsweetened applesauce at the store and used that. Beat that in with the 3/4 cup whipping cream.


In another medium bowl, mix together your 2 3/4 cups flour, 1 tablespoon cinnamon, 1 teaspoon baking powder, 1 teaspoon baking soda, and 1 teaspoon salt.


Slowly add in your flour mixture and beat it into the applesauce mixture until well combined.


Take smallish spoonfuls of the batter and place them about 2 inches apart on the baking sheet. It took me a little bit of trial and error to see how big to make the spoonfuls. My first batch of the cookies kind of baked together and I had to break them apart because my spoonfuls were too large. They were also a little too moist. But the subsequent batches were cooked better and a better texture.

Bake them for about 10-13 minutes or until the edges are a little brown.


Then you get to make the tasty filling!

In another bowl, add 1 cup of soft butter, 1/2 cup marshmallow fluff, 1/4 cup milk, 1/4 cup flour, and 1 teaspoon vanilla. Beat with a hand mixer until well mixed.


Then you are going to add in more powdered sugar than you feel is good for you. But it makes it so tasty. So just push that part to the back of your mind. Add it in slowly or when you mix it, it will turn into a giant cloud and go all over your kitchen. Trust me on this one.


Once you have your filling finished, spread a generous amount on one of your apple cookies and then use another one as a top.


Your finished whoopie pies should look like this:


Yum! It made quite a lot of these. The recipe said it makes about 36 and I think that's probably pretty accurate. I would eat them pretty soon after you make them because they are still kinda warm and that makes the filling kinda gooey and just delightful.

You can also store them in the fridge for about 24 hours before serving them.

I hope you like these! I thought they were fallish and yummy. I am off to go bake a cake for work tomorrow that I will be posting for sure in the next couple days so check back soon!

As always, thanks for reading!

Apple Whoopie Piesadapted from Fall Baking, Better Homes and Gardens Special Interest 2011

<3, Carly

Best Blogger Tips

Blogger Tips - Get This Gadget

Tuesday, August 30, 2011

Chai Breakfast Cupcakes

You know how sometimes you have something you haven't had in a long time and then  you have it and you are immediately re-obsessed with it?

This happened to me today. With Chai tea. I stopped to get breakfast this morning and the restaurant was plastered with signs about how delicious chai tea is and how I should clearly get one to have with my delicious bacon, egg, and cheese on marbled rye bagel. I did it. I am a victim of advertisements.

Anyway, I got home and was browsing my new Fall Baking magazine I got on a whim yesterday at the Wal-Marts and saw a recipe for Chai Cupcakes. I thought to myself...mmm...more chai.

But
I was also thinking of others! I work in accounting and tomorrow is month-end closing...which kinda sucks. So I thought I would make these and bring them in to share with my wonderful co-workers! It's a win-win situation. Or win-win-win.

Here are you ingredients!


Except the brown sugar. I don't know how and/or why that got in there. It just happened.

I was looking for my cupcake pans because I just moved about a month ago and was looking in my fancy lazy susan cabniet. I just like to show it off:


Yeah, it wasn't there. It was in the cabinet that I keep my baking sheets in. But whatevs...got to show off my sweet cabinet.

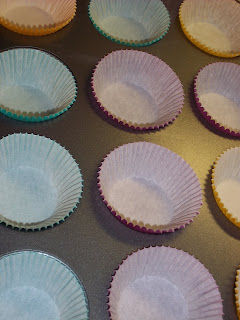
Once you locate your cupcake pans, fill them whatever pretty cupcake liners you like


While your oven is preheating to 350 degrees, mix your regular flour, wheat flour, baking power, baking soda, ginger and salt together in a medium bowl.


Then you need to put your milk in a saucepan and let it simmer, then you will put your chai tea bags in to steep. I dug out my favorite saucepan like thing that I saved to use for a whole year. I got it for Christmas the year that I lived with 4 boys, and I didn't want them to ruin it. It's super cool! Check it outttttttt!


Then, I realized that I did not in fact have the chai tea packets that the recipe called for, which was sad. I bought some chai tea while I was in India last year and I had yet to open it, when I finally did (today...just now) it turns out they are instant chai tea mixes. Oops.

Well, I did the best I could. After my milk started simmering, I added a couple pinches of nutmeg, cloves, and cinnamon and then added one packet of the instant ginger chai tea. I let it simmer a bit and took it off the heat. If you follow the rules for realizies, let the tea bags steep about 5 minutes, remove from the milk, and then let it cool.


In a separate large bowl, use your hand mixer to beat your softened stick of butter until it's all light and fluffy. On a side note, I like to assume everyone is using a hand mixer, because as much as I would love a Kitchen-Aid mixer, they are expensive as heck and I always feel sad when recipes just assume you have one. It also makes me feel like I am getting a mini arm workout. So there. Vindicated'd.


Add in your sugar and beat, then your vanilla, beat, egg, beat, egg number two, beat. It kind of sounds like a poem/rap/song. But that's how you do it.

Then you will alternatively add in the flour mixture and the milk mixture to your sugar/butter stuff. Beat until just combined on low speed. I forgot to take a picture of this part. Sorry...I hope you can find it in your heart to forgive me. But here is a picture of some of the batter after I poured it in the measuring cup.


I then poured the batter in my measuring cup to then pour in the cupcake liners.


Once you get your cupcake liners about 2/3 full, sprinkle with granola. The recipe calls for maple flavored granola which would indeed be delicious, but we had some granola that had dates and raisins and almonds and so I used that instead.


Bake your cupcakes for about 15-20 minutes or until a toothpick comes out clean. Or if you can't find your toothpicks maybe panic and instead insert a knife in and hope for the best.

I also may have gotten distracted by the kitty while the cupcakes were baking. Here he is. He's the cutest. And apparently a weird contortionist.

Back to the cupcakes.


I cut mine in half and put some delicious butter on it. It was tasty and crispy on top and had some fantastic chai flavor. I was afraid they wouldn't turn out well...but they turned out awwwwwwwwesome!

I hope everyone at work likes them tomorrow!

Chai Breakfast Cupcakes
adapted from Fall Baking from Better Homes and Gardens 2011

Ingredients

  • 1 1/2 c. flour
  • 1/2 c. whole wheat flour
  • 1 1/2 tsp. baking powder
  • 1/2 tsp. baking soda
  • 1/2 tsp ground ginger
  • 1/4 tsp. salt
  • 1 1/4 c. milk
  • 4 chai tea bags (I used 1 packet instant chai tea mix and a pinch of nutmeg, cinnamon, and cloves)
  • 1/2 c. butter, softened
  • 1 1/2 c. sugar
  • 1/2 tsp. vanilla
  • 2 eggs
  • 3/4 c. maple flavored granola (or really most any granola, but I used the kind with raisins/almonds/dates)
Directions
1. Preheat oven to 350, line 24 cupcake liners in cupcake pans. 
2. In a medium bowl, mix the flours, baking powder and baking soda, ginger, and salt and mix.
3. In a large bowl, beat butter until fluffy, then add in the sugar and eggs, beating well after each addition.
4. In a small saucepan, simmer the milk and steep the chai tea about 5 minutes, remove bags and then let it cool.
5. Alternate adding in the flour mixture with the milk mixture to the sugar and butter until combined.
6. Fill the cupcake liners to about 2/3 full then sprinkle with granola.
7. Bake about 15-20 minutes or until a toothpick inserted comes out clean.

As usual, thanks for reading! :)

<3, Carly
Best Blogger Tips

Blogger Tips - Get This Gadget